The people in my group are; Camillus Savea, Emily Jones, Teresa Jankovic and me
We agreed that the video either be a parody or a remake of some sort and that we would be in the video.
Our first idea was to make a Newscast of Planking, the new 'fad' where someone lies face-down on the ground with their arms by their side in random places. However we were not allowed to film this broadcast because it was thought of as inappropriate if we were with it OR against it.
Our next idea was to make a video of random dares. This would happen in school and one of our example random dares would be walking into a classroom and a Santa suit, shout HOHOHO and just sit and learn with the class for a while.
Seeing as our first was no good, we decided on doing our RANDOM DARES idea.
To go out with this idea we'd first have to write 4 random dares ourselves and share it with the group so we could discuss the props that are necessary.
Monday, May 23, 2011

Friday, May 20, 2011
Making a Ringtone
The original version of this song is called Lucifer by SHINee a Korean Pop group.
I edited the song so I could make a Chipmunk Version by going to the tools and changing the speed.
Monday, May 9, 2011
How To Organise Your Project
1 - Create a folder for your project
2 - Place resources in folder > video files
> music/soundtracks
> still images
3 - Make sure you have a folder in your S Drive AND your USB
4 - When the file is on your USB make sure that you have another file somewhere else!
5 - Open Movie Maker and import resources
- Note that you cannot import resources from your S DRIVE
6 - When saving you can save it as a project or a movie file.
- PROJECT: remembers last location of resources while you are working on the video. It is a "WORK IN PRGRESS"
- MOVIE: all resources are embedded and cannot be lost because it is saved as ONE file. It is "COMPLETED WORK".
7 - Synchronise your S DRIVE with USB at end of each lesson to not lose information.
2 - Place resources in folder > video files
> music/soundtracks
> still images
3 - Make sure you have a folder in your S Drive AND your USB
4 - When the file is on your USB make sure that you have another file somewhere else!
5 - Open Movie Maker and import resources
- Note that you cannot import resources from your S DRIVE
6 - When saving you can save it as a project or a movie file.
- PROJECT: remembers last location of resources while you are working on the video. It is a "WORK IN PRGRESS"
- MOVIE: all resources are embedded and cannot be lost because it is saved as ONE file. It is "COMPLETED WORK".
7 - Synchronise your S DRIVE with USB at end of each lesson to not lose information.
Wednesday, May 4, 2011
Intro to Audacity 3/5/11
Today we were introduced to a music editing software called Audacity. Here we can open up original tracks and change them so that they can be faster, slower, louder, higher, lower, played backwards and you can also take off the vocals to make an instrumental version. (These are all made in the effects tab)
There are many tools on Audacity such as;

These tools in order from left to right are; the selection tool, the envelope tool, the draw tool, the zoom tool, the time shift tool and the multi-tool mode button.
SELECTION TOOL- allows you to select and highlight areas of the sound clip you want to edit
ENVELOPE TOOL- when the envelope tool is selected two blue lines will appear and you drag the blue lines in and out of the track to change the volume.
ZOOM TOOL- click on the track with the magnifying glass icon until you are zoomed in as close as you want to be. This allows you to view the sound waves so you can see the music.
DRAWING TOOL- To use the drawing tool you must zoom in until you can finally see the samples (small blue points should appear on the sound wave) and you can move the different points.
TIMESHIFT TOOL- This tool is used when you have more than one track open and you can move the different track where you want it to play.
Tuesday, April 5, 2011
Digital Media
Five different types of digital media surrounding us in the world include;
- Mobile Phones
- eBooks
- Video games
- Internet
- Computers
What number system is digital data based on? What two digits are used to code all digital data?
Digital data is based on the Binary number system and the decimal Binary system. The 2 digits that are used to code all digital data are______
What is a bit? What is a byte?
A bit stands for binary digit which is 0 or 1, it is the smallest possible unit of information.
A byte is a sequence of binary digits which are operated as a unit to represent a character. it is usually made of 8 bits.
What is sampling rate? Find an image that explains how sampling works.
A sampling rate defines the number of samples per unit of time taken from a continous signal to make a discrete signal.

- Mobile Phones
- eBooks
- Video games
- Internet
- Computers
What number system is digital data based on? What two digits are used to code all digital data?
Digital data is based on the Binary number system and the decimal Binary system. The 2 digits that are used to code all digital data are______
What is a bit? What is a byte?
A bit stands for binary digit which is 0 or 1, it is the smallest possible unit of information.
A byte is a sequence of binary digits which are operated as a unit to represent a character. it is usually made of 8 bits.
What is sampling rate? Find an image that explains how sampling works.
A sampling rate defines the number of samples per unit of time taken from a continous signal to make a discrete signal.

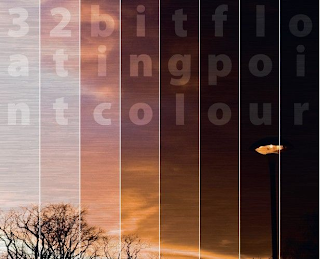
How does colour depth or bit depth effect the appearance of an image? Find images to illustrate the effect.
The Colour Depth affects an image because it determines how many colours the image will have and how realistic the image will appear. An example of different colour depths include Monochrome which can be black and white which is the lowest storage requirement and 32 bit colour which can be sometimes described as 'true colour' and allows each pixel to be 1 of 256 values.
Explain why sampling rate only affects video and not Still Media and why colour depth affects both still media and videos;
Sampling rate has no effect on Still Media because it is a STILL media and therefore has no sampling rate. The sampling rate for a video is better defined as the frame rate. The unit of time of how fast and/or slow the different frames of a video changes. The colour depth affects still media because it's a single image that can be altered to make the image look more realistic. The colour depth also affects videos because a video is made up of many frames and each frame can be altered the same way still media is edited and changed.
Wednesday, March 30, 2011
Making A Pacman Ghost on Inkscape

This was an example that we made so we would be able to use Inkscape for our Assignment.
This is the Process we followed;
Draw a circle using the ellipse tool (keep the Ctrl key pressed while dragging to get a circle) and then convert the circle to path (Path > Object to Path).
Convert to the node editor and add (by double-clicking) two nodes near the extreme left and right nodes of the circle.
![[pacman]](https://lh3.googleusercontent.com/blogger_img_proxy/AEn0k_sAbj7k265jrgGOk3qLpPsvTvHE7LxX2URHprCHrW7N3XIx0HZ93GhKULemqJXz1B-HA2qXuHvIKzgdw6p1cg9-1BEPUsW6KH8Nv3538ctzA_N2mcMuujEZm-96RyYQo4U=s0-d)
Select the two newly created nodes (with Shift) and drag them to the bottom (keep the Ctrl key pressed while dragging to restrict the movement to the vertical).
![[pacman]](https://lh3.googleusercontent.com/blogger_img_proxy/AEn0k_sCKOZM2R2PGILlvzSiqD6ryOAIYGEbsgSwBe36ixHOJcj2IGriYVmK3-ChvvKnNyfOmYxzNQJvKstUDC_mH-N1wM85zFyogfVoQcXgAgZUfS9aUjjPJsvktnqaernBSg=s0-d)
Select the newly created left node and the bottom node and press twice the insert new node button. Select the right and bottom nodes and repeat the operation (two insert nodes). Each segment will be split with 3 new nodes. You may now delete the left and right segmenting nodes to simplify the shape.
![[pacman]](https://lh3.googleusercontent.com/blogger_img_proxy/AEn0k_uCAlcrln5xaAP7OBELPb1i6rSlucBcO0Wp2ji5DvqiWAAqP7o2eau-nbJ-St-6CScLr_cAp8oAxhM57wJCJ7qpBft0_vRUdduUhkcyjQLVD4ilpU95-FpJIF3-PsCYSQ8=s0-d)
Select (with Shift) the two nodes left and right nearest to the original bottom node and move them up a bit (with Ctrl key pressed, to restrict the movement to the vertical).
This is the "ghost" shape.
![[pacman]](https://lh3.googleusercontent.com/blogger_img_proxy/AEn0k_uKais41ap6iqjP24ubrNO5ktU-Q3w06-lJlHg3p0uaSnzJmRJCK39VcmQ3BNi9u9hwiJ0ap_8bRfb7jtn6yfnXsVaAXDDqHxsj2LlGrUnGw3hucVL-rigtQ0bkCHutWw=s0-d)
The hard part has ended, we have the basic ghost shape, we can add the eyes (a white and a black circle, duplicate) and we have a simple Pac-Man baddie.
![[pacman]](https://lh3.googleusercontent.com/blogger_img_proxy/AEn0k_s01f9U773a0xRZhNomhLVXtCSN6F3oh6xDQk-mieVQW9kOOza_b-bCf3cgZYGJcHzZglppOFHHKeUHbHjCpdZXBCeU8Yi0Sv5lffVZ4lSyAIc-1yYR2oJLKXOb4t6fzA=s0-d)
But we will do something fancier, duplicate the ghost shape and make the duplicate black. Change the black color with a radial gradient going from completely transparent black at the center to partly transparent black at the margins. Move the center of the gradient up and left to have a light source.
![[pacman]](https://lh3.googleusercontent.com/blogger_img_proxy/AEn0k_uiJ0s2JogQ7P5HmJ9jnCPUKDo5B_LWtG6uHwL7xhJUjsYEoEsJvaN5j0wLTSmxXdiysxARNHUp_3oLLq9UiQMzP8AFwyLUCLYLMrCw6Ky2IYyt_1lB3NoN9wmqQERQsA=s0-d)
For the eye create a white circle, duplicate it and fill the duplicate with the same radial gradient. Add a smaller black circle. Group them, duplicate the group to get the second eye.
![[pacman]](https://lh3.googleusercontent.com/blogger_img_proxy/AEn0k_vXv81RlH5H9equsc5BMHr7S0UyBZHsPYu0e3TzFP7_IRKzoKXyXAQaTBKsV6sRMeeuKl7ibiuJXLfov_DbN2a9bCEEvnylOUgCAKfAn9WLDwvCdCKY6ylriqaoloaFSIA=s0-d)
Add a highlight: create an white ellipse, move it in the upper-left, rotate a bit apply some blur and reduce the opacity.
Optionally, create a second highlight in the same way.
For increased realism, add a shadow: a black ellipse at the bottom, move it below the rest of the graphic and fill with a radial gradient going from solid black at the center to partly transparent black at the margins.
Add a bit of blur to the shadow and we are done.
*Instructions from the given website
Monday, March 28, 2011
Assesment ; Creating an Animation
.
Describe what software you used and why you chose it:
In the actual process of creating each frame I used Inkscape because it was simple and had all the tools I required on the side bar instead of me having to search for them. I tried using shapes on Microsoft Office Word to make some shapes but I found it easier to use Inkscape. To create the actual animation I used Windows Live Movie Maker and used 91 frames.
Describe the creation process you followed:
I first copied an image of Manaphy (Blue Pokemon) as a PNG file and pasted it onto Inkscape. Using the Circle tool I created a circle for its head, body and 2 ovals for it's arms. To shape the head and the body I clicked 'Object to Path' and stretched the cirlce to shape it is now. to create it's ears I used the Bezier tool and smoothed the object path. To make the eyes I made 4 different circles. One yellow for the outer eye, One blue for the eye colour, one black for the pupil and one white for the eye moving it on top of each other to make it look like an eye. To make the stars I used shapes and filled them blue, to make the swirls of water I used the Calligraphic Brush Stroke tool, the Letters I used the Font tool and the bubbles I used the Circle tool. To create the flashing effect I changed the background colour to black and white for different frames. After each frame I exported the Vector image as a PNG file to use on Windows Live Movie Maker. I adjusted each frames time period so some were 0.03 seconds, 0.2 seconds, 0.11 seconds and others 0.15 seconds. When the frames were together I saved it as a movie and FINISHED :)
What image format were you saving your work in during the development of the frames/ What image format did you save your frames as?
While creating the frames I saved them as a Vector Image, then exported the all to PNG files so I would be able to use them on Windoes Live Movie Maker. When the animation was finished I saved it as a WMV file.
What frame rate were you aiming for?
I was aiming to be able to have around 10 frames per second. At times I made that goes and at other times I had it more than 10 frames a second, this was when I had the bubbles coming into the image saying M E R C E D E S.
What difficulties did you encounter and how did you overcome them?
Difficulties I had included not having Windows Live Movie Maker on my home computer and the fact that Inkscape always stopped working while I was in the middle of my frames making me delete those frames and start again. I ended up just making the frames at hom and doing the animation work at school and to overcome the problem with inkscape I saved the file each time i made a frame.
Subscribe to:
Posts (Atom)